To correctly show the dry matter intake of the animals, refusals need to be taken into account. TAP Feed Lite has the "Refusals" area where you can manually register refusals.
From the main menu, select "Refusals"
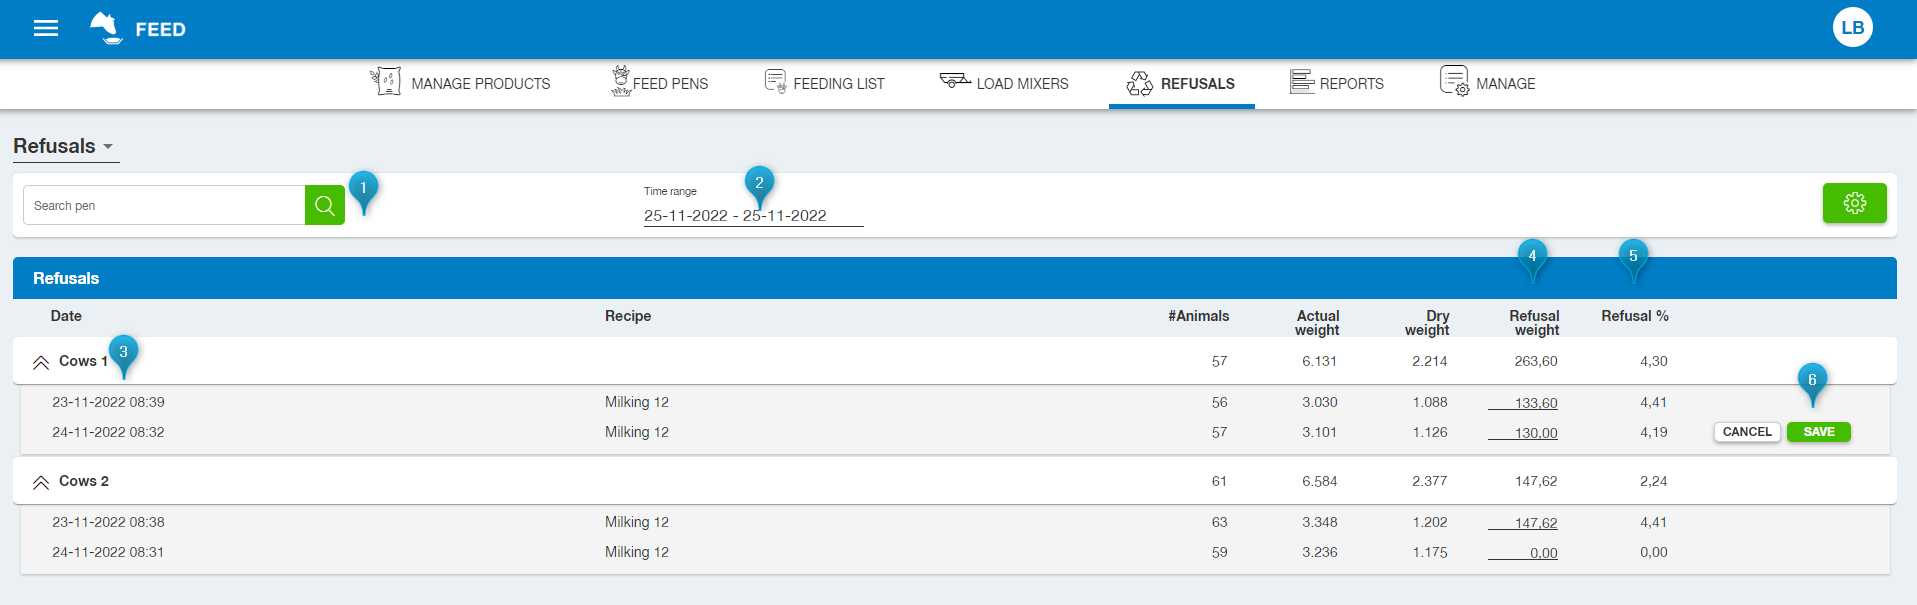
ref1.png19.07 KB The screen below will open. Default the screen will show all deliveries to the pens over the last 14 days.
The search bar can be used to find a particular pen.
Select the time range. This is set by default at 14 days.
Each pen can be expanded or collapsed by clicking on the name of the pen.
The amount of refusal can be manually entered per feeding in the column 'Refusal weight'. The refusal amount can never exceed the amount fed.
The column % refusal shows the percentage of refusals based on the amount fed.
Once the amount is entered, you can either ‘Save’ this entry or ‘Cancel’. To prevent from having to make too many mouse clicks, the ENTER key can be used for this. After the refusal value has been entered, the Enter key can also be used to save the changes and preselects the next rows value.
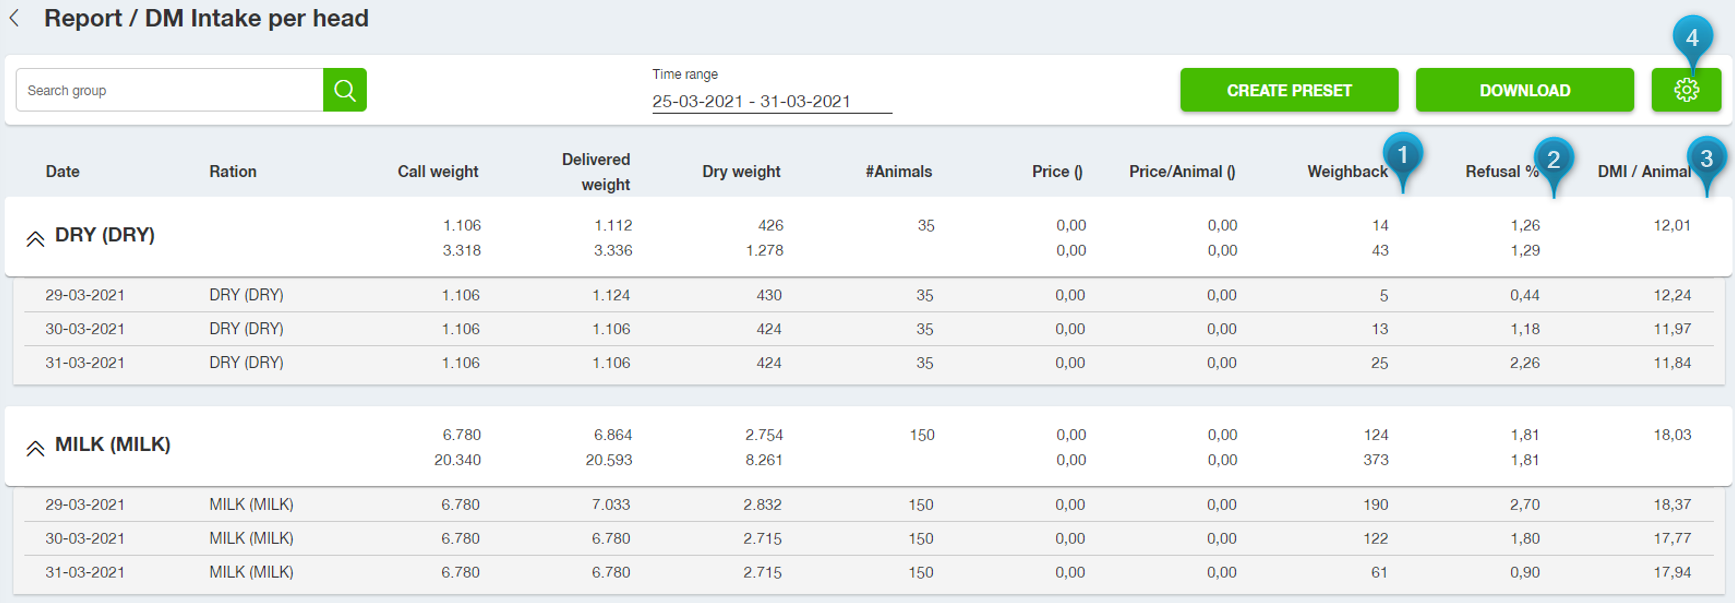
With the "Refusals" dropdown left top it is possible to navigate to other reports like the dry matter intake report. This will be opened for the time range chosen in the refusal screen. Here the effect of the entered refusals on the dry matter intake of the animals is visible.
The amount of refusal is shown, including the average and the total amount for this specific time range.
The % refusal based on the total amount is shown here, including the average and the total amount for this specific time range.
The DMI is displayed correct based on the entered refusal amounts.
Settings allows you to set properties.
Properties Using the properties icon you can configure how the [REFUSALS] area is opened. By default, the data is shown as collapsed. This can be changed and saved for future use by using ‘Apply & save’. If you only want to use the changes once, you choose ‘Apply’.
Other properties that can be changed are the days back, the pens that are shown and the pen types that should be included in the list.
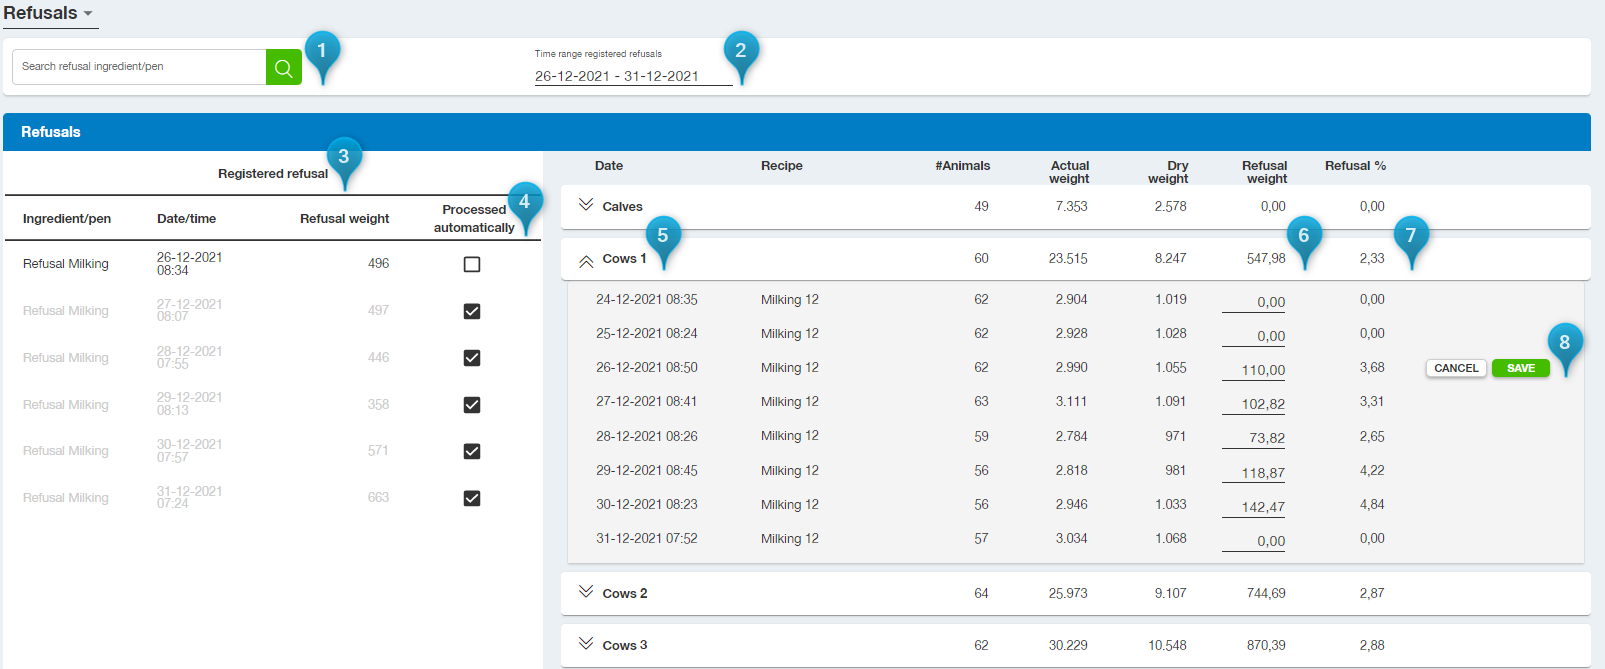
With TAP FEED Pro activated the refusal area is different compared to TAP FEED Lite. In TAP FEED Pro it is possible to create refusal ingredients which can be set up to automatically subtract refusal amounts from pen deliveries once used in recipes. Default the screen will show all deliveries to the pens over the last 7 days. Overview_refusals_with_nr.png110.23 KB
The search bar can be used to find a specific pen.
Select the time range. This is set by default at 7 days and the deliveries will be of 2 extra days since the registered refusal can be subtracted to a maximum of 2 days back.
When a refusal ingredient is recorded through the scale, this will be processed based on the configuration and possible to view and edit in the refusal area.
Based on the settings, the system will process the received refusal amounts automatically. When this is not possible, the box will remain unticked and a popup is shown: ‘Registered refusal amount not automatically processed. No deliveries found to subtract from in two days back time range. Enter the refusal amount manually with the correct delivery.’
Each pen can be expanded or collapsed by clicking on the name of the pen.
The amount of refusal can be manually entered per feeding in the column 'Refusal weight'. The refusal amount can never exceed the amount fed.
The column % refusal shows the percentage of refusals based on the amount fed.
Once the amount is entered, you can either ‘Save’ this entry or ‘Cancel’. To prevent from having to make too many mouse clicks, the ENTER key can be used for this. After the refusal value has been entered, the Enter key can also be used to save the changes and preselects the next rows value.
How did we do with this article?
Cookies & Tracking
In order to better understand how this site is used, we're making use of cookies to anonymously track your visit. We're not storing any personal information.


 Cookies & Tracking